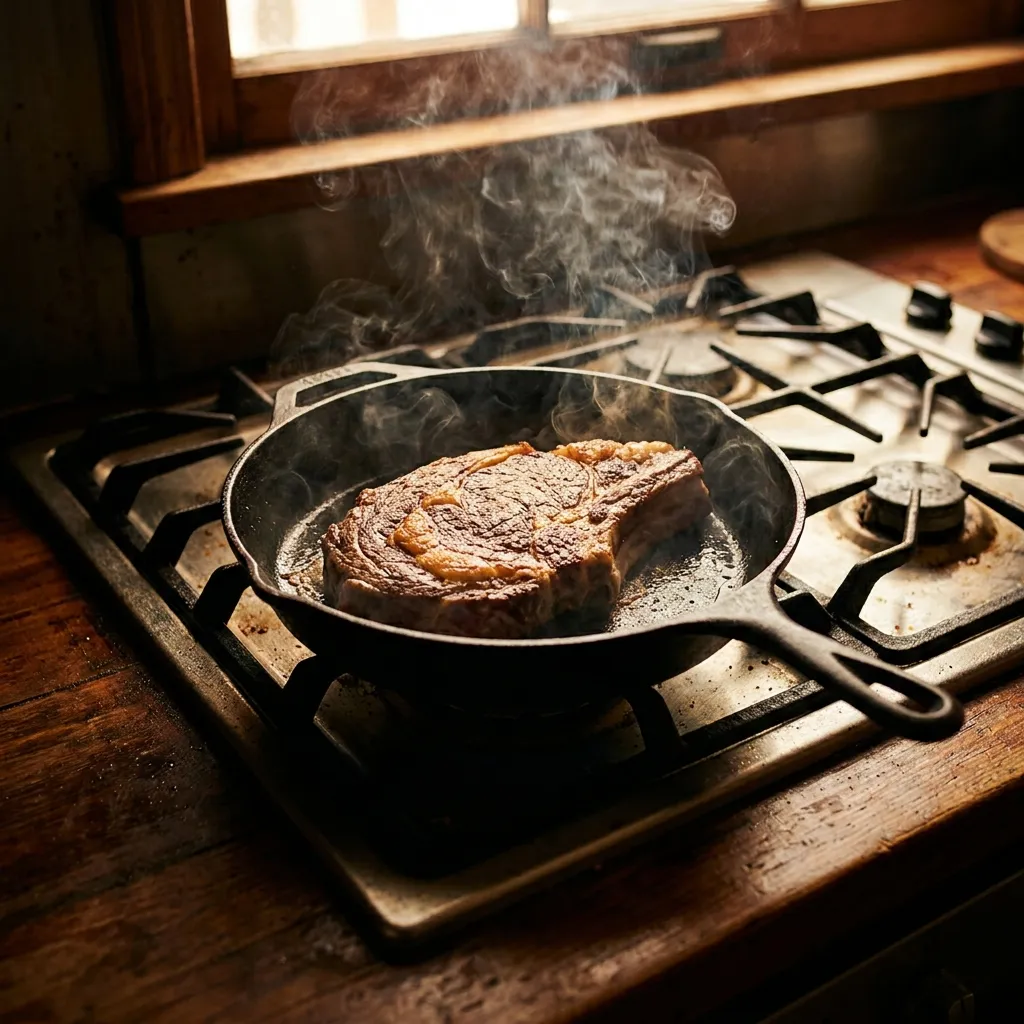
Sear Meat Perfectly: Heat, Timing, Crust
The pan is hot. The meat is in your hand. And in three seconds, you'll decide whether tonight brings a crispy crust or gray, tough meat lands on the table while your family waits. Most people blame the meat in this moment: too cheap, too thin, wrong cut. Or maybe not?
Why does the same meat fail even when you do everything the way you always do, and what exactly are those three seconds that make the difference?
The essentials
- The Maillard reaction only starts around 140°C. A pan that's too cold is the most common reason for a missing crust.
- Always pat meat dry before searing. Surface moisture prevents browning reliably.
- Core temperatures aren't guesswork: Chicken needs 74°C, pork 70°C, beef 55°C depending on doneness level (BfR).
- Rest time after searing (2-5 minutes) keeps the juice in the meat. Skipping this step costs moisture.
Why does meat in the pan fail so often?
Timing matters more than the expensive cut. And 80% of failed sears fail because the pan wasn't hot enough, not because of the meat itself.
This is where almost everyone looks, doubts, and wonders if the meat was good enough. But the problem happened a minute earlier.
The Maillard reaction, which creates crust and flavor, only begins around 140°C. Below that threshold, the meat stays gray, releases juice, and absorbs moisture instead of rejecting it. The result: no roasted flavor, no texture, disappointed faces at the table.
Three mistakes repeat in home kitchens especially often. First, the pan that's too cold because impatience fills it too early. Second, the wet meat straight from the package that creates steam instead of heat transfer. Third, turning too early, before a natural release crust has formed.
In FamFood kitchen tests, we found that 80% of failed sears happen because the pan wasn't hot enough when the meat hit it. The meat sticks, tears instead of flips, and the crust cracks before it can seal. Two more minutes of preheating solves this problem almost completely.
But that raises a follow-up question: Which pan actually holds heat long enough so damage doesn't happen before the meat even touches the surface?
Which pan is really right for searing?
For meat with a strong crust, a stainless steel or cast-iron pan is your best choice. We don't recommend non-stick pans in general, because their PTFE coating belongs to the PFAS family. Pan thickness determines heat retention: a thin bottom loses heat the moment cold meat hits it. A thick bottom buffers that temperature drop.
Pan type | Heat power | Non-stick | Best for |
|---|---|---|---|
Stainless steel | Very high | No | Steak, chops, schnitzel |
Cast iron | High, retains long | No (seasoned) | Thick cuts, roasts |
Non-stick | Medium | Yes | We don't recommend it (PFAS) |
Stainless steel: high heat, no non-stick stress
Stainless steel pans handle sustained high temperatures and create strong browning. Meat sticks at first but releases itself once the crust is done. That's not a mistake, that's the process. Don't force it. Wait.
Cast iron: heat storage for thick cuts
Cast iron heats slowly but holds temperature much more consistently than stainless steel. For cuts over 2.5 cm thick, that's a clear advantage. The FamFood pan guide for families gives a detailed overview of which pan fits which family budget.
What about non-stick pans?
We don't recommend non-stick pans. PTFE belongs to the PFAS family, and according to the German Consumer Center, how very small particles from damaged coatings affect the body has not been researched yet. For a crust on steak, reach for stainless steel or cast iron.
The best pan won't help, though, if what you put in it works against the crust from the start, and that begins 30 minutes earlier.
How do you prep meat before searing?
Meat should be at room temperature (20-30 minutes out of the fridge) and patted dry with paper towels right before searing. Surface moisture prevents crust formation because the energy needed to evaporate water pulls the pan temperature below the Maillard threshold.
Patting dry isn't optional. Water on the meat's surface must evaporate before browning can happen. That costs time and temperature. With family-sized portions (2-4 pieces at once), these effects add up: the pan cools more, the steam that forms prevents browning on all pieces at once. Better to sear in two batches than crowd four pieces into one pan.
On room temperature: with thin slices under 2 cm, the effect is measurably small. With thick cuts over 3 cm, letting them acclimate noticeably cuts cooking time in the center and reduces the risk of overcooking the outside while the inside stays cold.
For salting, there are two schools of thought. Early salting (45 minutes or longer beforehand) pulls moisture out, which gets reabsorbed and leaves the surface drier—good for crust. Salted just before searing, moisture stays on the surface at first. Salted right after searing, the meat doesn't lose juice, but seasoning penetrates less. High-water marinades always need good drying. Acidic marinades can also soften the surface.
And even if the meat is dry and at room temperature in the pan, what goes into that pan, and especially when, decides whether heat arrives or burns.
Temperature and oil: What goes in the pan and when?
Heat the pan first, then add oil, then immediately add the meat. Heating oil in a cold pan burns fatty acids and creates bitter flavors. Refined rapeseed oil or clarified butter are your best all-purpose choices for high heat. The German Center for Nutrition (BZfE) recommends refined oils with high smoke points for high-heat searing, since unrefined oils oxidize sooner.
Fat | Smoke point | Good for |
|---|---|---|
Refined rapeseed oil | ca. 200-230°C | Hard searing, universal |
Clarified butter (ghee) | ca. 205°C | Schnitzel, chops, flavoring |
Extra virgin olive oil | ca. 160-180°C | Gentle cooking, vegetables |
Refined coconut oil | ca. 200°C | Alternative all-purpose |
You'll know the pan is hot enough by the water test: drop a water droplet on the pan. If it evaporates instantly (Leidenfrost effect), the pan is ready. If the droplet dances as a ball on the surface, it's too hot. Turn the heat down briefly, add oil, add meat.
Butter isn't for searing, but for finishing. Once the meat is flipped and the core temperature approaches your target, reduce heat, add butter, and baste with a spoon. Thyme and crushed garlic cloves intensify the effect. This isn't luxury, it takes 60 seconds and makes the difference between "good" and "very good."
But heat, oil, crust—and then what? How do you recognize the moment almost everyone thinks is done too early?
When is the meat done? The finger test explained
The finger test is the fastest method without a thermometer. Raw meat feels soft like your relaxed thumb pad. Medium rare matches the resistance of your thumb pad when thumb and index finger barely touch. Fully cooked feels like a tensed muscle, firm and unyielding. For certainty, reach for a meat thermometer. With chicken and pork especially, this isn't comfort—it's food safety.
Core temperatures: the numbers you should remember
Meat | Doneness | Core temperature |
|---|---|---|
Beef (steak) | Rare | 52-55°C |
Beef (steak) | Medium | 58-62°C |
Beef (steak) | Well done | 70°C+ |
Pork | Fully cooked | 70-72°C |
Chicken | Fully cooked | 74°C (BfR recommendation) |
The recommendations for pork and chicken are based on food safety guidelines from the German Federal Institute for Risk Assessment (BfR). When cooking for children, follow these strictly.
Rest time: brief but crucial
After searing, the meat comes off the heat onto a cutting board or warm plate and rests 2-5 minutes. During this time, temperatures inside the meat equalize and juices redistribute back into the tissue instead of running out immediately. A steak cut right away loses noticeably more juice than one that rested. With family portions, use the rest time to finish your sides. Learn more about why steak gets tough anyway in the FamFood post Why Does Steak Get Tough? 7 Mistakes and How to Fix Them.
What works for beef steak is non-negotiable for food safety with chicken breast, and for pork the truth lies exactly in the middle, where most home cooks make mistakes.
How do you sear different meats correctly?
Beef steak, pork chops, and chicken breast follow fundamentally different logic. Beef benefits from short, hard heat and rest time. Pork needs a fully cooked inside at moderate heat. Chicken must cook evenly without drying out. Keeping these three differences in mind solves most everyday kitchen problems.
Searing beef steak right
Pan to maximum heat. Oil in, steak in, 2-3 minutes per side depending on thickness, don't move it. When the steak releases by itself, the crust is done. Flip, reduce heat slightly, check core temperature, butter-and-herb basting, rest time. One flip is enough for a steak under 3 cm thick.
Pork chops without a dry result
Pork can't stay at maximum heat. Sear hard first (2 minutes per side), then reduce to medium or put the chop in the oven at 160°C for 8-10 minutes. That protects against a burned outside and raw center. Core temperature 70-72°C.
Chicken breast staying juicy
Chicken breast's uneven thickness is the problem. The thin end cooks fast, the thick middle stays raw. Solution: pound flat before searing or butterfly it lengthwise. Alternatively, sear in the pan, then cover and cook on low 5-7 minutes to finish. Core temperature 74°C is non-negotiable. Ground meat and sausages follow similar rules—full cooking, no shortcuts.
If you think that's everything, you're missing the one step that undoes all your work, and almost everyone skips it because it doesn't feel like cooking.
What are the 5 mistakes families make searing meat?
The five most common mistakes are: pan too cold, meat too wet, flipping too early, crowding the pan, and skipping rest time. Each one costs either crust or moisture.
- Pan too cold: Preheat at least 2 minutes, do the water test.
- Meat too wet: Always pat dry with paper towels, blot off marinades.
- Flipping too early: Wait until the meat releases by itself.
- Crowding the pan: With 4 pieces, sear in two batches instead. A crowded pan makes steam not heat. The temperature drop is measurable. This is the everyday bottleneck in home kitchens that almost nobody talks about openly.
- Skipping rest time: 2-5 minutes of patience brings the juice back into the meat.
If your sauce doesn't come out as planned, the FamFood post on saving sauce helps.
But what if you do everything right and the meat still raises questions that haven't been answered here?
Frequently asked questions
Should I salt meat before or after searing?
Early salting (45 minutes beforehand) dries the surface and improves crust because the pulled moisture gets reabsorbed. Salting right before searing is fine too. Salting just before the pan is worst: moisture sits on top, evaporates, and prevents browning. Salting after searing works if you want control over salt level.
Can I use butter to sear?
Not for hard searing. Butter burns around 150-160°C and gets bitter. For finishing at the end of cooking it's perfect: reduce heat, add butter with herbs and garlic, baste the meat. That gives roasted flavor without bitterness.
Why does my meat stick to the stainless steel pan?
Because the pan wasn't hot enough. In a properly hot stainless steel pan, a steam layer forms between meat and pan bottom that releases the meat after a short time. If it sticks, just wait. Pulling too early tears the crust. Also, less oil helps: too much oil cools the pan and prevents the temperature you need at the contact surface.
How long does meat need to rest before I slice it?
A steak (2-3 cm) needs 2-3 minutes rest. A chop or chicken breast about 3-5 minutes. Larger roasts need proportionally more time, up to 10-15 minutes. In the home kitchen, rest time isn't luxury—it's the easiest way to prevent dry meat.
Which oil is best for hard searing?
Refined rapeseed oil is the best all-purpose choice: high smoke point (200-230°C), flavor-neutral, affordable. Clarified butter is a more aromatic alternative with a similar smoke point and works well for schnitzel and chops. Extra virgin olive oil is better saved for salads or gentle cooking.
About FamFood
FamFood is the digital kitchen companion for families, built by people who cook with kids themselves and know that everyday life is rarely perfect. Here you'll find recipes, kitchen tips, and tools that actually work in real home kitchens, not just on TV. Stop by at famfood.app.